Map tiles for eInk displays
In some map applications that run on microcontrollers with eInk displays, such as Meshtastic or Meshcore, you need special map tiles. Some guides recommend using restricted APIs, or some guide provide map tiles with specific or tricky rules to optimize them for these screens. The problem is that these APIs often have limited free quotas or do not cover all geographic areas.
This alternative uses Maperitive with the default rule set (no complex configuration) and a Python script for post-processing. It also works with previously downloaded tiles, for example, color tiles you might already have for TFT screens.
This guide also includes some Linux tips and improvements for copying tiles to the device’s SD card. All steps were tested on a LilyGO T-Deck Pro, which features an eInk display.
Maperitive installation (Linux)
First, download Maperitive. This software is designed for Windows, but there are a few ways to run it on Linux.
docker-wine
This version of Wine is easy to launch and comes preconfigured for good desktop integration. Download docker-wine and run it inside the Maperitive directory as follows:
cd Maperitive
docker-wine --as-root --force-owner --volume=$PWD:/data wine /data/Maperitive.exe
mono
Another option is to run Maperitive using Mono libraries. The downside is that you need to install these libraries on your system. With docker-wine, everything runs inside an image that you can remove later without affecting your system. After installing Mono, run:
cd Maperitive
chmod +x ./Maperitive.sh
./Maperitive.sh
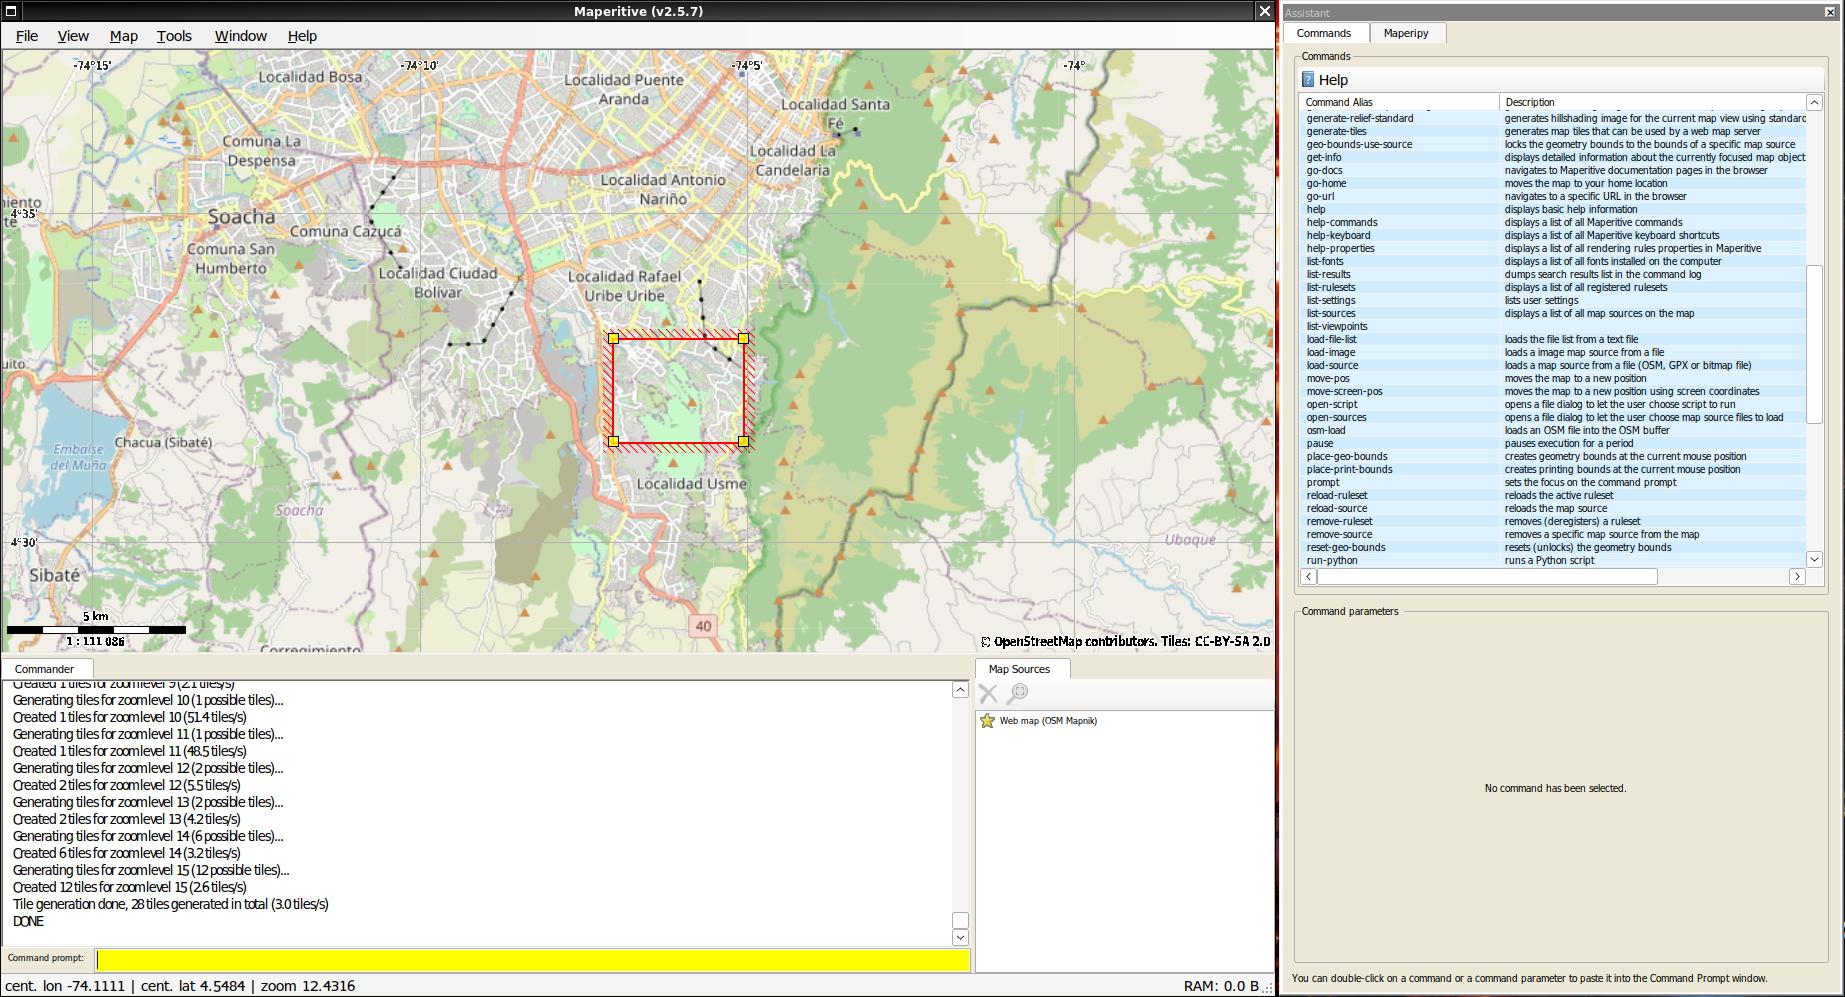
Tiles Generation
Once Maperitive is running, you can select your area and generate tiles. To do this, go to MAP -> Set Geometry bounds, draw or expand the square around your desired area, and then run the following commands in the Command prompt box:
(only for docker-wine option:)
change-dir /data/
tiles generation:
generate-tiles minzoom=6 maxzoom=17
This may take a while, possibly an hour or more, depending on the area and zoom levels. Once finished, you will find the tiles in the Maperitive directory.
Grey Scale Tiles Convertion
Now we can convert these tiles to an optimized version for eInk displays, such as the one on the T-Deck Pro. Download this script osm_tile_to_eink.py and run it like this:
python osm_tile_to_eink.py Tiles tiles_grey --mode bw
The Tiles directory should be inside the Maperitive directory. The original tiles will remain unmodified, so you can keep a backup for TFT screens or other color devices, or for future post-processing modifications.
Transfer Tiles to SD
Depending on the firmware or device you are using, you should copy these tiles to the root of the SD card. For example, with Meshcore, they need to go into a tiles directory at the SD card root.
Copying can be slow due to the large number of files. Below are a few alternatives to speed up the process.
rsync
This is better than the normal cp command, but it can still take a considerable amount of time.
rsync -av --progress /path/to/source/Tiles /mnt/sd_image/tiles
SD card image (recommended)
For maximum speed, create a full disk image with all the tiles, then write that image to the SD card partition. Please keep in mind that you should back up the card beforehand. Follow these steps:
create a empty image:
truncate -s 16G sd_image.img
format the empty image. For instance for Meshcore:
sudo mkfs.vfat -F 32 -n "MeshCore2" sd_image.img
mount the image:
mkdir /mnt/img
sudo mount -o loop,uid=$(id -u),gid=$(id -g),umask=000 /tmp/sd_image.img /mnt/img
copy the tiles. For instance for Meshcore:
rsync -av --progress tiles_grey /mnt/img
mv /mnt/img/tiles_grey /mnt/img/tiles
sudo umount /mnt/img
Now write the image to the SD card. The card may be /dev/sdd (whole device) or /dev/sdd1 (if you only want to overwrite the first partition). If you want to preserve the existing partition table (e.g you have a boot partition), write only to the data partition:
sudo dd if=sd_image.img of=/dev/sdd1 bs=4M status=progress
done. You are able to test your new map tiles :)
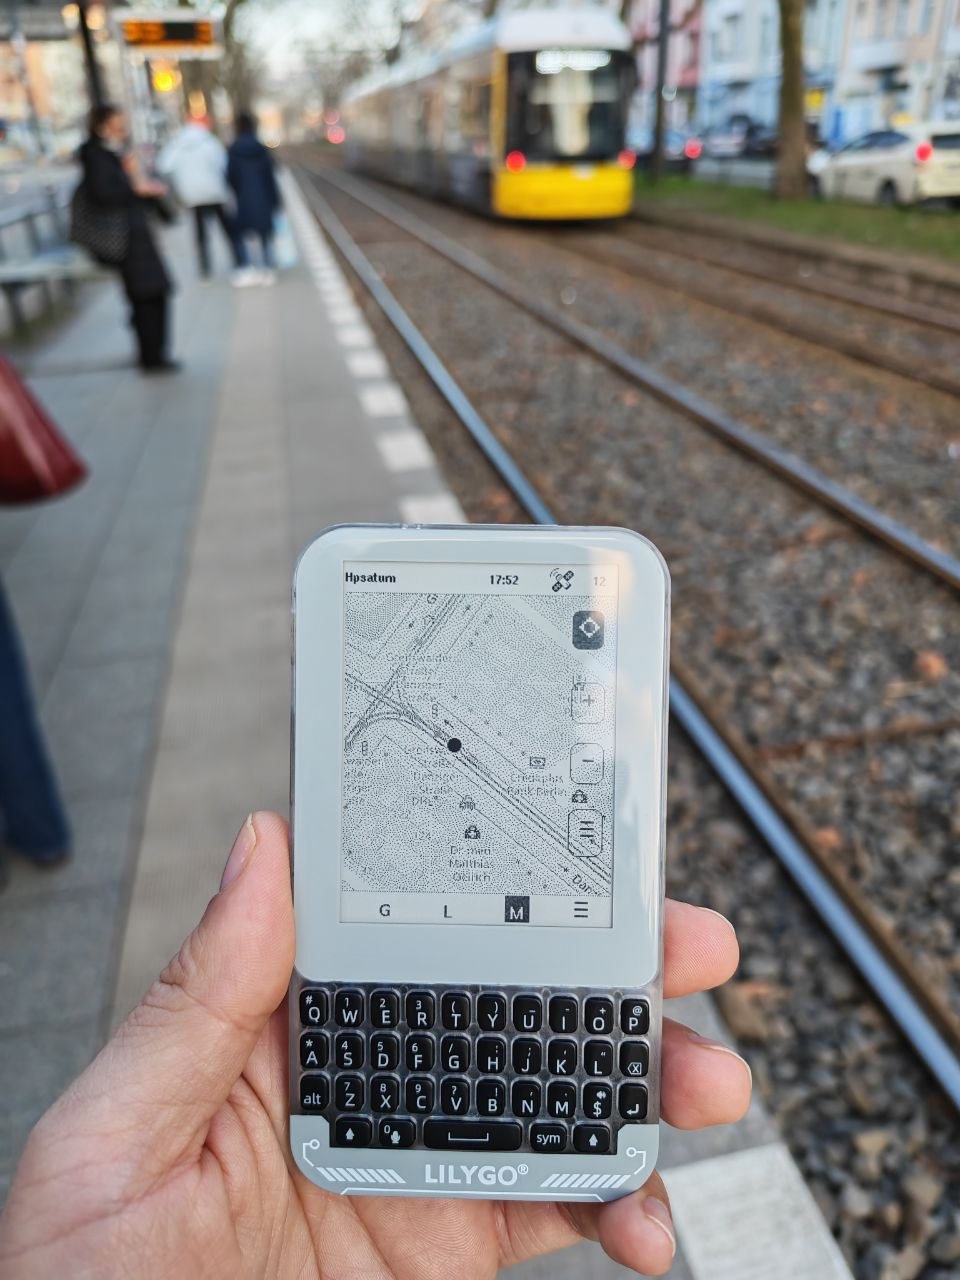
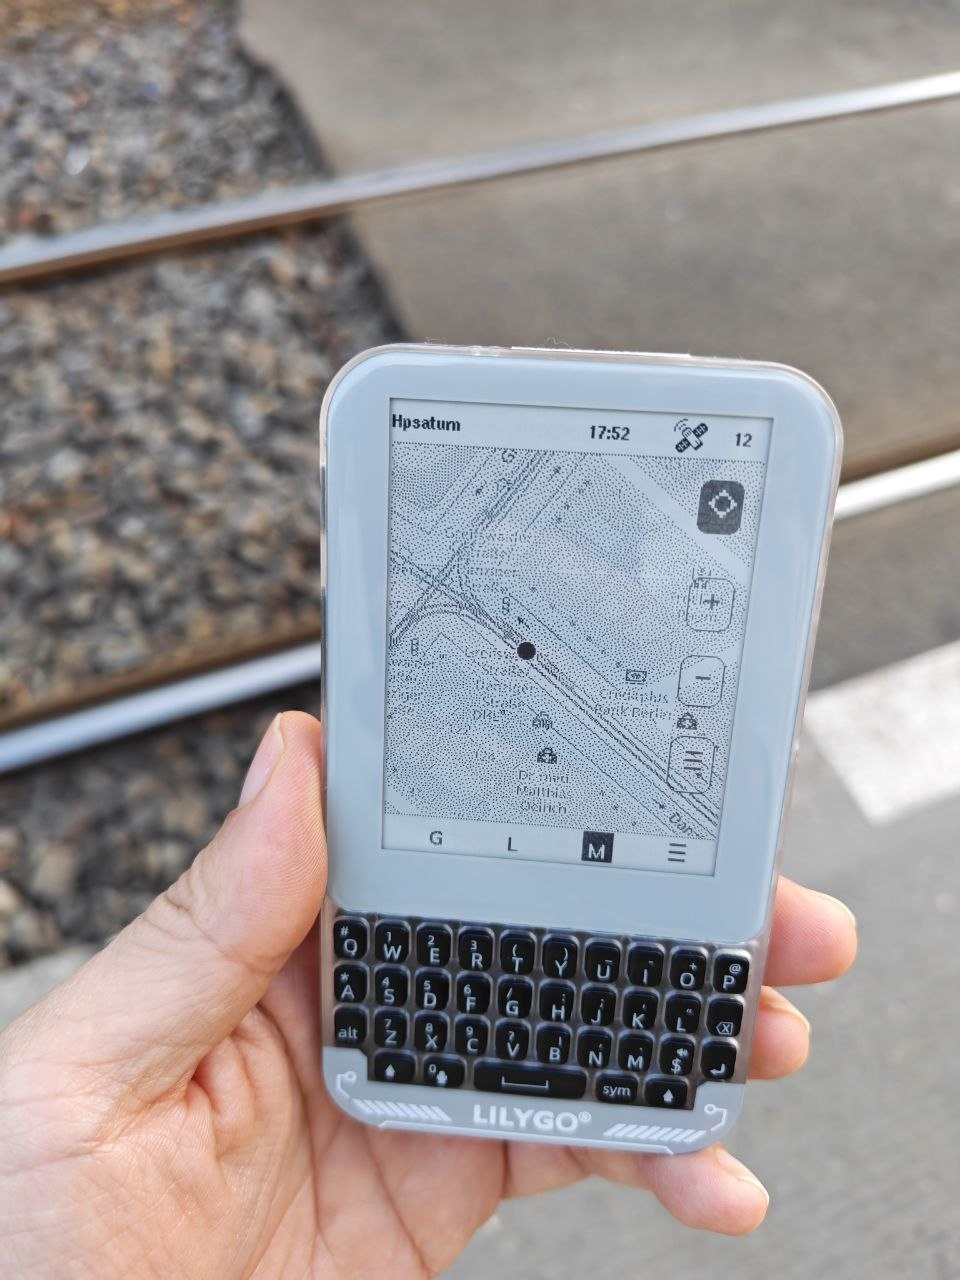
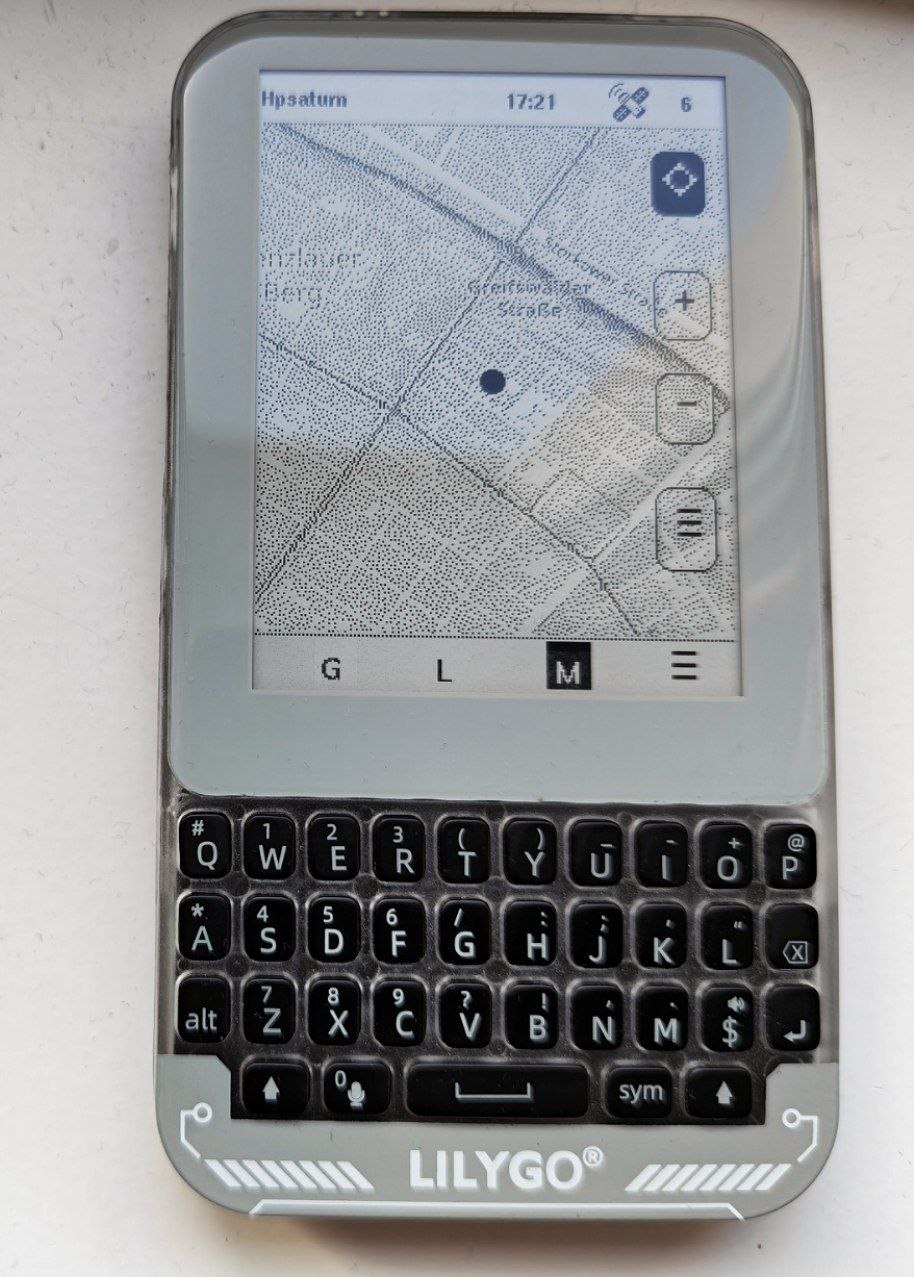
Results
Credits
IceNav Project for initial tips and a first understanding of Maperitive
Meshcore Project for its initial guide using restrictive APIs (inspiration for this guide 😄)
OpenStreetMap and its community. None of this would have been possible without them.